Untangle Necklaces Like a Pro: Hands-On Hacks Revealed!

The age-old problem of knotted jewelry plagues many, but mastering how to untangle a necklace with hands is surprisingly achievable. Baby oil, a common household item, serves as an effective lubricant to ease knots. Patience, a crucial attribute, is as valuable as any tool in this endeavor. Experts at the Jewelry Artisans Guild emphasize the importance of gentle manipulation. The practice originated in ancient civilizations, illustrating a timeless need for delicate solutions.

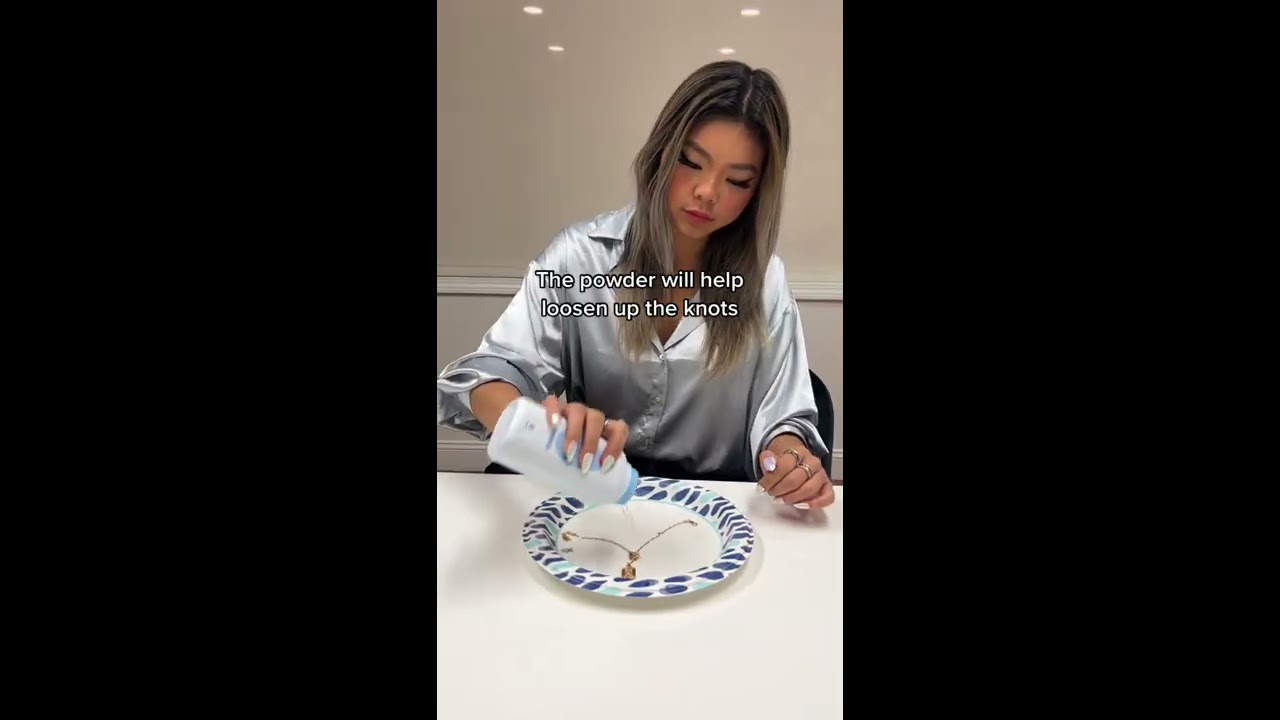
Image taken from the YouTube channel Jewlr , from the video titled Jewlr | How to Untangle a Knot in a Chain .
The Gordian Knot of Jewelry: Taming Tangled Necklaces
We've all been there. You reach for that perfect necklace to complete your outfit, only to be confronted by a hopelessly snarled mess of chain. A wave of frustration washes over you as you realize you're about to embark on a jewelry untangling odyssey.
This isn't just a minor inconvenience; it's a universal experience. It's the jewelry box equivalent of encountering a digital "loading" screen, a temporary obstacle that stands between you and accessorized bliss.
The Anatomy of a Tangle
But why do necklaces tangle so easily? The answer lies in a perfect storm of physics and material properties.
Movement is a primary culprit. Every time a necklace shifts in your jewelry box or during wear, the links rub against each other. This friction creates opportunities for knots to form, especially with delicate chains.
Chain type also plays a significant role. Finer chains with smaller links are more prone to tangling than chunkier, more rigid designs. The looser the weave of the chain, the easier it is for it to catch on itself and create a knot.
The clasps themselves can also contribute to the problem, acting as anchors around which the chain can twist and coil.
A Hands-On Solution: Reclaiming Your Jewelry
Fortunately, a tangled necklace doesn't have to be a lost cause. With the right tools and techniques, you can successfully untangle even the most stubborn knots using nothing more than your own two hands (and perhaps a few household items).
This guide provides a step-by-step approach to conquering the chaos, empowering you to reclaim your jewelry and avoid the frustration of tangled necklaces. Learn to master the art of untangling, and you'll never have to sacrifice your style to the whims of unruly chains again.
The hands-on approach to untangling is invaluable, of course, but success often hinges on understanding what you're up against. Not all tangles are created equal. Recognizing the specific type of knot you're facing, and how the chain itself contributes to the problem, is the first step toward choosing the right untangling strategy.
Understanding the Enemy: Identifying Common Types of Necklace Tangles
Before you dive into untangling, take a moment to assess the situation. Understanding the type of tangle and the characteristics of the chain will significantly impact your strategy and your chances of success. Consider the "enemy" you are about to face.
Decoding the Knot: Classifying Necklace Tangles
Necklace tangles come in a surprising variety of forms. Recognizing these different types allows you to select the most appropriate untangling technique and avoid unnecessary frustration.
Simple Knots: The Everyday Annoyance
These are the most common type of necklace tangle. A simple knot usually involves a single loop or twist in the chain.
They are generally easier to resolve, often responding well to gentle manipulation with your fingers.
Complex Knots: A Tangled Web
Complex knots involve multiple interwoven loops and twists. They can be much tighter and more challenging to untangle than simple knots.
These tangles often require the use of tools like pins or needles to carefully separate the chain links.
Multiple Strands: The Layering Nightmare
If you wear multiple necklaces at once, you've likely encountered this scenario. Multiple strands become intertwined, creating a complex web of knots and overlaps.
These tangles require a systematic approach, focusing on isolating and untangling one strand at a time.
Chain Reaction: How Chain Type Affects Tangles
The type of chain plays a significant role in how easily a necklace tangles and how difficult it is to untangle. Different chain types have different properties that affect their behavior.
Delicate Chains: Prone to Problems
Fine chains, like cable chains or snake chains, are particularly susceptible to tangling due to their flexibility and small links. Their very nature, that makes them so attractive, also renders them very susceptible to knotting.
The delicacy of these chains also means they are more prone to damage during the untangling process, requiring extra caution.
Chunky Chains: More Resistant, But Still Vulnerable
Thicker chains, such as curb chains or rope chains, are generally more resistant to tangling than finer chains because of their larger links and greater rigidity.
However, they are not immune to tangles, and when they do tangle, the knots can be quite stubborn.
Beaded or Embellished Chains: Special Considerations
Chains with beads, pendants, or other embellishments require extra care during untangling. The embellishments can become snagged or damaged if not handled gently.
Be extra careful when manipulating the chain around these elements.
By carefully assessing the type of tangle and the chain involved, you can choose the right untangling strategy and increase your chances of success. Understanding the nature of the "enemy" is half the battle.
Decoding the knot and understanding the chain's construction are crucial first steps. But before you even think about picking at that frustrating tangle, remember this: successful necklace untangling isn't just about technique. It's about setting yourself up for success. The right tools, the right environment, and, perhaps most importantly, the right mindset can dramatically improve your chances of a positive outcome.
Preparation is Key: Tools, Environment, and Mindset for Untangling
Untangling a delicate necklace can feel like defusing a tiny bomb. Rushing in without a plan is a recipe for disaster, potentially leading to broken chains or frayed nerves. Taking the time to prepare properly will not only increase your chances of success but also minimize the risk of damage.
The Untangling Mindset: Patience is Paramount
The most crucial tool in your untangling arsenal isn't a needle or oil – it's patience. Tangles are rarely solved with brute force. Approaching the task with a calm and deliberate mindset is essential.
Avoid tackling a tangle when you're already stressed or in a hurry. Frustration will only cloud your judgment and lead to more forceful, damaging maneuvers. Take a deep breath, clear your mind, and accept that this might take some time.
Setting the Stage for Success
Your physical environment plays a surprisingly large role in the untangling process.
A well-lit, flat surface is non-negotiable.
-
Flat Surface: Choose a stable surface where the necklace can lay undisturbed. A desk, table, or even a hard-backed book can work well. Avoid soft or uneven surfaces, as they can make it harder to manipulate the chain.
-
Good Lighting: Adequate lighting is crucial. Shadows can obscure the knot's structure and make it difficult to see what you're doing. Natural light is ideal, but a bright lamp will also work. Consider using a magnifying glass for especially intricate knots.
Gathering Your Untangling Arsenal
While your fingers will be your primary tools, a few strategic additions to your toolkit can make the job much easier.
The Power of Your Fingers: Start Gentle
Always begin with the gentlest approach possible. Your fingers are often the most effective tools for loosening knots without causing damage.
Use your fingertips to gently tease apart the tangle, focusing on identifying the individual loops and twists. Avoid pulling or tugging forcefully.
When to Call in Reinforcements: Pins, Needles, and Precision
For tighter, more complex knots, you may need to enlist the help of fine tools.
- Needles and Pins: Sewing needles or straight pins can be invaluable for separating individual links and creating slack in the knot. Use the pointed end to gently work between the links, carefully loosening the tangle. Be extremely cautious not to scratch or damage the necklace.
The Slippery Solution: Lubricants for Loosening Knots
Lubricants can significantly reduce friction and help the chain links slide past each other more easily.
- Baby Oil, Powder, and Other Lubricants: A tiny drop of baby oil, mineral oil, or even a dusting of talcum powder can work wonders. Apply the lubricant sparingly to the knot itself, avoiding the rest of the chain. Gently massage the lubricant into the tangle and then try loosening it with your fingers or a pin. Remember to clean the necklace afterwards.
Examining the Clasp: A Hidden Key to Untangling
Sometimes, the position of the clasp can actually contribute to the tangle.
Take a close look at how the clasp is oriented within the knot. If possible, try to manipulate the clasp to create more slack in the surrounding chain. Opening the clasp might also allow you to work on the tangle from a different angle.
Hands-On Hacks: Step-by-Step Untangling Techniques
With the proper environment and mindset established, it's time to delve into the practical methods for conquering those frustrating necklace tangles. Remember, patience is your greatest ally, and a delicate touch is paramount to avoid damage. We'll explore techniques ranging from gentle finger work to the strategic use of pins and lubricants.
The Gentle Approach: Using Your Fingers as Untangling Tools
Often, the simplest solution is the best. Before reaching for any tools, try using your fingers to gently tease apart the tangle. This method is particularly effective for loose knots and less intricate snarls.
How to Gently Loosen a Knot Without Force
The key here is gentle manipulation. Avoid pulling or yanking, which will only tighten the knot and potentially break the chain.
Instead, focus on identifying the individual strands that make up the knot. Use your fingertips to gently push, wiggle, and coax these strands apart.
Think of it as massaging the knot, rather than attacking it.
Emphasizing Small, Deliberate Movements
Precision is crucial. Work slowly and deliberately, focusing on one small section of the tangle at a time.
Avoid large, sweeping motions, as these can easily worsen the knot.
Instead, use small, controlled movements to gradually loosen the individual strands.
Take breaks as needed to maintain your focus and prevent frustration.
The Pin and Needle Method: Precision Untangling
When finger work alone isn't enough, a pin or needle can be a valuable tool for separating stubborn chain links. This method requires extra caution and a steady hand.
Carefully Separating Chain Links
A fine needle or pin (like a sewing needle or a safety pin) can be used to gently pry apart individual links that are caught in the knot.
Insert the tip of the needle between the intertwined links and gently push or wiggle to create space.
The goal is to loosen the links without forcing them apart or damaging the metal.
Avoiding Damage: A Word of Caution
This method carries the risk of scratching or bending the chain, especially if it's delicate. Always work slowly and cautiously.
Avoid using excessive force. If a link is particularly stubborn, try a different approach or apply a small amount of lubricant.
Be especially careful when working with plated jewelry, as the plating can easily chip or scratch.
The Lubrication Station: Baby Oil and Powder to the Rescue
Sometimes, a little lubrication is all you need to loosen a tight knot. Baby oil and powder can help the chain links slide past each other more easily, making the untangling process smoother and less stressful.
How Baby Oil Helps Loosen Knots
A tiny amount of baby oil can work wonders on stubborn tangles. The oil reduces friction between the links, allowing them to move more freely.
Apply the oil sparingly to the knotted area using a cotton swab or your fingertip.
Work the oil into the knot gently, and then try teasing the links apart with your fingers or a pin.
Minimalist Application Techniques
Less is more when it comes to lubrication. Applying too much oil can make the necklace slippery and difficult to handle, and it can also attract dust and dirt.
Start with a very small amount of oil and add more only if needed.
After untangling the necklace, gently wipe away any excess oil with a soft cloth.
Alternatively, a light dusting of talcum powder can also help to loosen knots by reducing friction. Apply the powder sparingly and gently brush away any excess.
The Pin and Needle Method and strategic application of lubricants like baby oil and powder can work wonders when necklaces become hopelessly knotted. However, the best approach is always to avoid the tangle in the first place. Mastering the art of necklace care involves understanding preventative measures that minimize the chances of your precious jewelry becoming a frustrating jumble.
Prevention is Better Than Cure: Avoiding Future Tangles
The time and effort spent meticulously untangling necklaces is valuable; time that could be spent enjoying wearing them instead. Fortunately, simple changes to how you store and handle your necklaces can significantly reduce the likelihood of future tangles. By adopting proactive strategies, you can maintain your necklaces in pristine condition, ready to complement your style without the pre-wear frustration.
The Storage Showdown: Hanging vs. Laying Flat
One of the most fundamental choices in necklace care is deciding how to store them. The debate between hanging and laying flat is a crucial one, and the ideal method often depends on the type of necklace you own.
Hanging necklaces is generally preferred, especially for longer chains and those prone to knotting. A dedicated jewelry organizer with hooks or a necklace tree allows each piece to hang freely, preventing them from intertwining. This method keeps them separated and visible, making it easy to select the perfect accessory.
Laying necklaces flat can be suitable for delicate pieces or those with intricate pendants that might be stressed by hanging. However, it's crucial to ensure they are laid out individually, avoiding any overlap that could lead to tangling.
Individual Sanctuaries: Pouches and Compartments
Regardless of whether you hang or lay your necklaces flat, individual storage is key to preventing tangles. Consider using soft pouches or jewelry boxes with separate compartments to house each necklace.
Fabric pouches, such as those made from velvet or satin, provide a protective barrier against scratches and tangles. Similarly, compartmentalized jewelry boxes offer a structured way to keep each necklace separate and organized.
This method is especially beneficial for delicate chains, as it prevents them from rubbing against other jewelry pieces, minimizing the risk of damage and entanglement.
The Power of the Clasp: A Pre-Storage Ritual
Before storing any necklace, take a moment to close the clasp. This simple act can make a surprisingly big difference in preventing tangles.
An open clasp is essentially an invitation for the chain to snag on itself or other jewelry pieces. By closing the clasp, you create a closed loop, reducing the chances of the necklace becoming entangled during storage or transport.
This practice is particularly important when traveling with jewelry, as necklaces are more likely to move around and tangle inside a travel case. Making it a habit to close clasps before storing your necklaces is a small investment in time that can save you from future frustration.
Video: Untangle Necklaces Like a Pro: Hands-On Hacks Revealed!
FAQs: Necklace Untangling Expertise
Here are some frequently asked questions about untangling necklaces and keeping them tangle-free.
What's the best surface to untangle necklaces on?
A flat, well-lit surface is crucial. Think of a table or desk covered with a soft cloth to prevent scratches. Good lighting helps you see the knots clearly, which is essential for learning how to untangle a necklace with hands effectively.
What tools are most helpful for untangling necklaces?
Small tools like needles, pins, or even toothpicks can work wonders. These help gently loosen tight knots without damaging the chain. Using baby oil or similar lubricant alongside these tools can also ease the process of how to untangle a necklace with hands.
What kind of lubricant is safe to use on delicate necklaces?
Baby oil or mineral oil is generally safe and effective. Apply a tiny amount to the knot, let it sit briefly, and then gently work the knot loose. After untangling, clean the necklace with mild soap and water. Knowing how to untangle a necklace with hands often involves using lubricant safely.
How can I prevent my necklaces from tangling in the first place?
Storing necklaces individually is key. Use separate pouches, hang them on a jewelry rack, or lay them flat in a jewelry box. Also, always close the clasp before storing to prevent snags and knots. Proper storage drastically reduces the need for figuring out how to untangle a necklace with hands.