Stuck Ring? How to Take Off a Belly Button Ring Safely!

A stuck belly button ring can cause significant discomfort and potential complications, often necessitating knowledge of how to take off a belly button ring safely. For example, Lotion reduces friction on the skin, aiding in the removal process. Understanding the threading of your specific jewelry is crucial. You'll also want to know about infection. Knowing the early signs can help prevent further issue. If you are going through that now you should consider consulting a piercing professional, who has the expertise and specialized tools to assist, especially if simple methods fail.
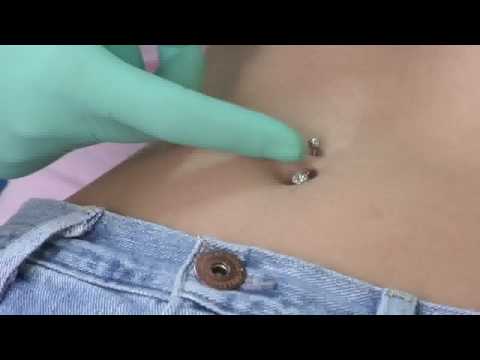
Image taken from the YouTube channel ExpertVillage Leaf Group , from the video titled Body Piercing Tips : Removing a Belly Button Ring .
The Perils of a Stuck Belly Button Ring
Belly button rings, also known as navel rings, have become a popular form of self-expression. They adorn midriffs of all ages, reflecting individual style and adding a touch of personality.
From simple studs to elaborate dangling designs, these body piercings are a common sight. The trend continues to evolve with endless aesthetic options.
The Unforeseen Snag: When Beauty Becomes a Burden
However, the path to self-expression isn't always smooth sailing. A common and frustrating problem arises when these beloved belly button rings get stuck.
What starts as a stylish accessory can quickly turn into a source of discomfort and anxiety. This frustrating predicament affects many wearers.
Our Mission: Safe Passage for Your Piercing
This article aims to provide a comprehensive guide to safely removing a stuck belly button ring. Our intention is to equip you with the knowledge and techniques.
These methods prioritize safety and effectiveness. Our goal is to help you navigate this tricky situation without causing further harm.
We will explore gentle yet effective strategies to free your jewelry. These strategies help to restore comfort and prevent potential complications.
The Golden Rule: Gentle Hands, Happy Piercing
It is crucial to resist the urge to forcefully remove a stuck ring. This can lead to a host of problems.
Aggressive pulling can result in pain, swelling, irritation, and even infection. These can cause damage to the delicate skin around the piercing.
Our step-by-step approach will help you avoid these pitfalls. We will ensure a smooth and painless resolution to your stuck-ring dilemma. We will ensure you are equipped with gentle strategies.
Why Your Belly Button Ring Won't Budge: Common Culprits
We’ve established the potential for belly button rings to become stubbornly lodged, leading to discomfort and concern. But what exactly causes this frustrating predicament? Understanding the common culprits behind a stuck ring is the first step towards resolving the issue safely and effectively.
Let's delve into the primary reasons why your belly button ring might refuse to cooperate.
Swelling: The Initial Obstacle
Swelling is a frequent offender, particularly in the early stages of a piercing or after a period of irritation.
A freshly pierced navel is essentially an open wound, and the body's natural response is to initiate the healing process, which includes inflammation.
This inflammation can constrict the piercing channel, making it difficult to move the jewelry freely.
Even established piercings can become swollen due to friction from clothing, accidental snags, or allergic reactions.
Infection: A More Serious Concern
Infection presents a more serious challenge.
When bacteria invade the piercing site, the body mounts an immune response, often resulting in inflammation, redness, and pus formation.
The skin around the piercing can tighten significantly, further trapping the jewelry.
Attempting to force a ring through an infected piercing can exacerbate the problem, potentially spreading the infection and causing more pain and damage.
It’s crucial to recognize the signs of infection – persistent pain, swelling, redness, yellow or green discharge, and a foul odor – and seek prompt medical attention.
Build-Up: The Silent Aggressor
Over time, dead skin cells, sebum (natural skin oil), and residue from soaps, lotions, and other products can accumulate around the jewelry.
This build-up can act like glue, effectively sticking the ring to the skin.
Neglecting regular cleaning can worsen this issue, creating a breeding ground for bacteria and increasing the risk of infection.
Regular cleaning is essential to prevent this build-up.
Jewelry Quality: The Hidden Hazard
The quality of your belly button ring plays a significant role in its comfort and safety.
Cheap jewelry, often made from nickel or other allergenic materials, can trigger an allergic reaction in sensitive individuals.
This reaction manifests as inflammation, itching, and skin irritation, leading to swelling and making the ring difficult to remove.
Furthermore, poor-quality jewelry may have rough edges or uneven surfaces that can snag on the skin, contributing to the problem.
Opting for hypoallergenic materials like surgical stainless steel, titanium, or gold is always recommended to minimize the risk of allergic reactions and ensure a smoother piercing experience.
Over time, factors like swelling, infection, and even the slow accumulation of skin cells can turn a once-effortless task into a frustrating ordeal. While many cases of stuck jewelry can be resolved with patience and gentle techniques, it's crucial to recognize when the situation demands professional intervention. Knowing the difference can save you from unnecessary pain, complications, and potential long-term damage.
When to Call in the Pros: Recognizing Serious Situations
It's easy to fall into the trap of thinking you can handle a stuck belly button ring on your own. After all, it's your body and your piercing, right?
However, there are specific circumstances where DIY attempts can be detrimental and seeking professional help is not just advisable, but essential. Recognizing these situations is crucial for protecting your health and preserving your piercing.
When Self-Removal is a No-Go
Certain scenarios automatically disqualify you from attempting to remove the ring yourself. Do not proceed if any of the following apply:
- Severe Pain: If you experience intense, throbbing pain that extends beyond the immediate piercing site, something is seriously wrong. Further manipulation could worsen the situation.
- Embedded Jewelry: If the jewelry is visibly embedded in the skin or surrounded by overgrown tissue, attempting to force it out can cause significant trauma.
- Uncertainty: If you're unsure about the cause of the problem or feel uneasy about attempting the removal yourself, err on the side of caution and seek professional advice.
The Infection Red Flags: Time to Seek Medical Help
One of the most critical reasons to seek professional help is the presence of a serious infection. Navel piercings, like any piercing, are vulnerable to bacterial invasion, and a neglected infection can have serious consequences.
It's important to distinguish between minor irritation and a full-blown infection.
While mild redness or slight swelling can often be managed with proper aftercare, certain signs indicate a more serious situation that requires immediate medical attention.
- Pus Discharge: The presence of thick, yellow, or green pus oozing from the piercing site is a telltale sign of infection.
- Fever: A fever, even a low-grade one, indicates that the infection has spread beyond the immediate area and is affecting your entire body.
- Hot to the Touch: If the skin around the piercing is noticeably warmer than the surrounding skin, it suggests inflammation and potential infection.
- Red Streaking: Red streaks emanating from the piercing site are a serious sign that the infection is spreading through your bloodstream.
- Severe Swelling: Excessive swelling that doesn't respond to cold compresses or over-the-counter anti-inflammatory medications is a cause for concern.
If you experience any of these symptoms, it's imperative to consult a medical professional or a dermatologist as soon as possible. Delaying treatment can lead to more severe complications, such as:
- Cellulitis: A deep skin infection that can spread rapidly.
- Abscess Formation: A painful collection of pus that may require surgical drainage.
- Septicemia: A life-threatening bloodstream infection.
Who to Consult: Your Healthcare Team
When facing a stuck belly button ring and suspecting a serious issue, you have several professional resources available.
- Medical Doctor: A general practitioner can assess the situation, diagnose any infection, and prescribe appropriate antibiotics.
- Dermatologist: A dermatologist specializes in skin conditions and can provide expert care for piercing-related issues, including infections, allergic reactions, and scarring.
- Professional Piercer: A reputable piercer may be able to offer advice on removal techniques, but they are not medical professionals and cannot treat infections.
Choosing the right professional depends on the specific circumstances. If you suspect an infection, a doctor or dermatologist is the best choice. If you're unsure about the cause of the problem or need guidance on safe removal techniques, a reputable piercer may be able to assist, but always prioritize medical advice when infection is suspected.
Ultimately, your health and well-being should always be the top priority. When in doubt, seeking professional help is always the safest and most responsible course of action. Don't hesitate to consult a medical professional if you have any concerns about your belly button piercing.
One of the most anxiety-inducing moments for anyone with a belly button piercing is realizing their ring is stuck fast. Before panicking or resorting to drastic measures, remember that a calm, methodical approach is key.
DIY Rescue: A Step-by-Step Guide to Safe Removal
In many cases, you can safely remove a stuck belly button ring at home with a little patience and the right techniques. However, it's essential to proceed cautiously and listen to your body. If you encounter significant resistance or pain at any point, stop immediately and consult a professional piercer or medical professional. This guide outlines a safe, step-by-step method for removing a stubborn ring.
Preparation: Setting the Stage for Success
Proper preparation is crucial for preventing infection and ensuring a smooth removal process. Rushing into the removal without these steps increases the risk of complications.
Hand Hygiene: Your First Line of Defense
Begin by thoroughly washing your hands with antibacterial soap and warm water. This is non-negotiable. Dirty hands introduce bacteria to the piercing site, increasing the likelihood of infection. Scrub for at least 20 seconds, paying attention to the areas under your nails.
Cleaning the Piercing Area: Minimizing Irritation
Next, gently clean the area around the belly button ring with a mild, fragrance-free soap and warm water. Use a soft cloth or cotton swab to carefully remove any visible debris or crust. Avoid harsh soaps, alcohol, or hydrogen peroxide, as these can irritate the piercing and make removal more difficult.
Lubrication: The Key to a Smooth Exit
Lubrication is your best friend when dealing with a stuck belly button ring. Applying a lubricant reduces friction, allowing the jewelry to slide out more easily and minimizing trauma to the surrounding tissue.
Choosing Your Lubricant: Options and Considerations
Several options work well as lubricants. Consider using a small amount of one of the following:
-
Body-safe oil: Jojoba, emu, or coconut oil are excellent choices.
-
Water-based lubricant: These are readily available at most pharmacies.
-
Unscented lotion: Choose a simple, hypoallergenic lotion to avoid irritation.
Avoid using petroleum-based products like Vaseline, as they can be difficult to clean off and may trap bacteria.
Application Technique: Gentle and Thorough
Apply a small amount of your chosen lubricant directly around the belly button ring, focusing on the points where the jewelry enters and exits the skin. Use a cotton swab or your clean fingertips to gently massage the lubricant into the piercing channel. Allow the lubricant to sit for a few minutes to fully saturate the area and loosen any stuck debris.
Gentle Manipulation: Patience is Paramount
This is where patience and finesse come into play. Avoid the urge to yank or force the ring. Instead, focus on gentle, controlled movements.
The Twist and Wiggle: Small Movements, Big Results
Gently twist the belly button ring back and forth, applying very slight pressure. Simultaneously, try to wiggle the jewelry up and down. The goal is to slowly break down any adhesions or buildup that are preventing the ring from moving freely.
The Power of Patience: Avoiding Brute Force
- Never force the jewelry. If you encounter significant resistance, stop and reapply lubricant. Continue the gentle twisting and wiggling motion, taking breaks as needed. Remember, slow and steady wins the race. Forcing the ring can cause tearing, bleeding, and a significantly increased risk of infection.
Addressing Swelling: Cooling Things Down
Swelling is a common culprit behind stuck belly button rings. If the area around your piercing is visibly swollen, reducing the inflammation can make removal much easier.
The Cold Compress: A Natural Anti-Inflammatory
Apply a cold compress to the piercing site for 10-15 minutes at a time. You can use an ice pack wrapped in a towel or a cold, wet cloth. The cold temperature will help to constrict blood vessels, reducing swelling and alleviating pain. Repeat this process several times before attempting to remove the ring again.
Post-Removal Care: Soothing and Preventing Future Problems
Successfully removing a stuck belly button ring is a victory, but the journey doesn't end there. Proper aftercare is paramount to ensure the piercing site heals well, remains free from infection, and minimizes the chances of future complications. Neglecting this critical phase can undo all your careful efforts and lead to prolonged healing or even necessitate medical intervention.
Cleansing the Pierced Area: A Gentle Approach
The immediate focus should be on gentle but thorough cleaning. Avoid the temptation to scrub or use harsh chemicals. The piercing area is likely to be sensitive and needs a soothing touch.
A saline solution is your best friend during this period. You can purchase a pre-made sterile saline wash or create your own by dissolving 1/4 teaspoon of non-iodized sea salt in one cup of warm, distilled water.
Using a clean cotton ball or swab, gently cleanse the area around the piercing twice daily. Be sure to remove any crust or debris that may have accumulated. Pat the area dry with a clean paper towel. Avoid using bath towels, as they can harbor bacteria.
Monitoring for Signs of Irritation or Infection
Even with the most diligent care, irritation or infection can sometimes occur. Regularly monitoring the piercing site is essential for catching any problems early.
Pay close attention to the following signs:
- Increased redness or swelling: A little redness immediately after removal is normal, but persistent or worsening redness can indicate a problem.
- Pain or tenderness: Mild tenderness is expected, but increasing pain or a throbbing sensation warrants attention.
- Discharge: Clear or slightly yellowish discharge is usually normal in the initial healing phase. Greenish, yellowish, or foul-smelling discharge is a clear sign of infection.
- Warmth: The area around the piercing feeling abnormally warm to the touch.
- Fever: Although less common, a fever accompanied by other symptoms could indicate a systemic infection.
When to Seek Professional Medical Assistance
While many minor irritations can be managed with proper aftercare, some situations require the expertise of a medical professional. Don't hesitate to seek help if you experience any of the following:
- Signs of a spreading infection: Red streaks emanating from the piercing site.
- Persistent or worsening symptoms: Symptoms that don't improve after a few days of diligent home care.
- Severe pain or swelling: Intense discomfort that interferes with daily activities.
- High fever: A fever of 100.4°F (38°C) or higher.
- Concerns about scarring: If you're worried about keloid formation or other scarring issues.
A doctor can properly diagnose the issue, prescribe appropriate antibiotics if needed, and provide guidance on minimizing scarring. Delaying treatment can lead to more serious complications, so err on the side of caution.
Preventing Future Issues with Stuck Rings
Once your piercing has fully healed, you can take steps to minimize the chances of your belly button ring getting stuck again.
Here are some preventive measures:
- Choose high-quality jewelry: Opt for jewelry made from hypoallergenic materials like surgical stainless steel, titanium, or gold. Avoid cheap metals that can cause allergic reactions and irritation.
- Maintain good hygiene: Regularly clean the piercing area, even after it has fully healed.
- Avoid tight clothing: Tight clothing can rub against the piercing and cause irritation. Choose loose-fitting garments whenever possible.
- Be mindful of your activities: Activities like swimming in chlorinated pools or engaging in contact sports can increase the risk of irritation or infection. Clean the piercing thoroughly after such activities.
- Consider wearing a retainer: If you need to remove your belly button ring for medical procedures or other reasons, consider using a retainer to keep the piercing open.
- Regularly inspect your jewelry: Check your jewelry for any signs of damage, such as loose balls or sharp edges. Replace damaged jewelry immediately.
- Keep the area moisturized: Dry skin can contribute to rings getting stuck. Apply a small amount of fragrance-free moisturizer around the piercing site.
By following these guidelines, you can ensure a healthy, happy piercing and avoid the frustration of a stuck belly button ring in the future. Prevention is always better than cure.
Video: Stuck Ring? How to Take Off a Belly Button Ring Safely!

Hopefully, you're now unstuck and feeling much better! Remember these tips if you ever need to know how to take off a belly button ring safely in the future. Good luck!