Medallion Magic: Install Your Ceiling Medallion Like a Pro!

Thinking about adding architectural flair to your home? A ceiling medallion is a fantastic way to elevate any room, and the process of how to install a ceiling medallion might be simpler than you think. Home Depot offers a wide variety of medallions, but the adhesive you choose, like those available from Loctite, is just as important as the medallion itself. The proper surface preparation, a crucial step highlighted by many DIY experts, ensures lasting results, regardless of whether you're installing around a chandelier or a simple light fixture. The ceiling fan, although not directly part of a medallion install, is a reminder to turn OFF the power for safety.

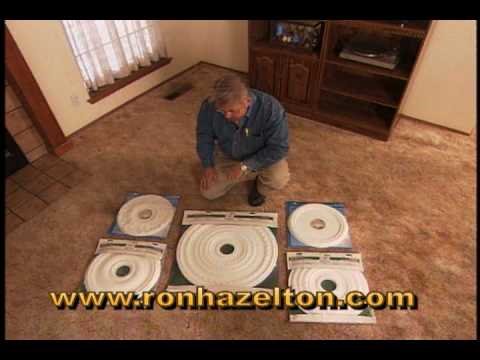
Image taken from the YouTube channel Today's Homeowner with Danny Lipford , from the video titled How to Install a Ceiling Medallion .
Medallion Magic: Install Your Ceiling Medallion Like a Pro!
This guide will walk you through the process of installing a ceiling medallion, transforming a plain ceiling into a sophisticated focal point. We'll cover everything from selecting the right medallion to the final touches, ensuring a professional-looking result. The core focus is on understanding how to install a ceiling medallion correctly and safely.
1. Planning and Preparation: The Foundation for Success
Before you even think about adhesive, proper planning is crucial. This step helps avoid mistakes and ensures a smooth installation.
1.1 Selecting Your Medallion
- Size Matters: The medallion's diameter should be proportional to the size of your light fixture or fan. A general rule is that the medallion's diameter should be approximately half the diameter of the fixture or the diameter of the chandelier canopy.
- Material Choice: Consider the material of your medallion. Options include:
- Polyurethane: Lightweight, easy to cut, and paintable.
- Plaster: Offers a more traditional and intricate design but can be heavier.
- Wood: Adds a natural, rustic touch, but requires careful sealing and finishing.
- Style Considerations: Choose a medallion style that complements your existing decor. Consider the architectural style of your home (e.g., Victorian, modern, contemporary).
1.2 Gathering Your Tools and Materials
Having the right tools on hand will make the job much easier. Here's a checklist:
- Ceiling Medallion: Of course!
- Construction Adhesive: High-quality adhesive specifically designed for ceiling applications. Loctite Power Grab Ultimate is a good option.
- Painter's Caulk: For filling gaps and creating a seamless finish.
- Caulk Gun: To apply the painter's caulk.
- Measuring Tape: To accurately measure the ceiling and medallion.
- Pencil: For marking locations.
- Level: To ensure the medallion is installed straight.
- Utility Knife: For trimming excess adhesive or caulk.
- Safety Glasses: Protect your eyes from debris.
- Dust Mask: Protect your lungs from dust, especially when working with older ceilings.
- Gloves: Protect your hands from adhesive and caulk.
- Ladder or Step Stool: To safely reach the ceiling.
- Sanding Block or Sandpaper (Optional): For smoothing rough edges.
- Paint (Optional): To match the medallion to your ceiling.
- Wood shims or scrap wood pieces: Needed if the electrical box is recessed or is positioned unevenly relative to the ceiling plane.
1.3 Preparing the Ceiling Surface
A clean and stable surface is essential for proper adhesion.
- Clean the Area: Remove any dust, dirt, or cobwebs from the ceiling where the medallion will be installed. You can use a damp cloth or vacuum cleaner.
- Check for Loose Paint or Plaster: Scrape away any loose or flaking paint or plaster.
- Prime (if necessary): If the ceiling surface is porous or uneven, consider applying a primer to improve adhesion. This is especially important for plaster ceilings.
2. Installation Process: Step-by-Step Guide
Now that you've planned and prepped, it's time to install the medallion. These steps will illustrate how to install a ceiling medallion safely and effectively.
2.1 Marking the Center
- Find the Center: Determine the exact center of the light fixture or fan opening on the ceiling. This is usually where the electrical box is located.
- Mark the Center: Use a pencil to clearly mark the center point on the ceiling.
- Test Fit: Briefly hold the medallion up to the ceiling, aligning its center with the marked center point. This helps visualize the placement and identify any potential issues.
2.2 Applying Adhesive
- Apply Adhesive to Medallion: Apply a generous bead of construction adhesive to the back of the medallion, around the outer edge and in a few serpentine patterns across the surface. The goal is to ensure even contact with the ceiling. Do not apply adhesive to the electrical box opening.
- Applying Adhesive to Electrical Box or Shims: If the electrical box is recessed or not aligned to the ceiling, then the wood shims should be glued to the electrical box and to the ceiling with appropriate adhesive. Use multiple pieces of wood shims until they are even with the ceiling plane.
2.3 Attaching the Medallion
- Align and Press: Carefully align the medallion's center with the marked center point on the ceiling. Gently press the medallion against the ceiling, applying even pressure to ensure good contact.
- Hold in Place: Hold the medallion in place for the amount of time recommended in the adhesive's instructions (usually a few minutes).
- Secure with Support (If Needed): If the medallion is heavy or the adhesive is slow-curing, use temporary supports to hold it in place while the adhesive dries completely. Options include:
- Painter's tape
- Wooden shims wedged between the medallion and the ceiling.
- A support board propped up from the floor.
2.4 Allow Adhesive to Cure
- Follow Instructions: Let the adhesive cure completely according to the manufacturer's instructions. This is crucial for a secure and lasting installation. This may take several hours or overnight.
- Remove Supports: Once the adhesive is fully cured, carefully remove any temporary supports.
3. Finishing Touches: Achieving a Professional Look
The finishing touches are what truly elevate the look of your installed ceiling medallion.
3.1 Caulking the Edges
- Apply Caulk: Using a caulk gun, apply a thin, even bead of painter's caulk around the perimeter of the medallion where it meets the ceiling. This will fill any gaps and create a seamless transition.
- Smooth the Caulk: Use a wet finger or a damp cloth to smooth the caulk line, creating a clean and professional finish.
3.2 Painting (Optional)
- Prime (If necessary): If you're painting the medallion a different color than the ceiling, apply a primer first to ensure good adhesion.
- Paint the Medallion: Paint the medallion with your desired color, using multiple thin coats for even coverage.
- Touch Up the Ceiling: If necessary, touch up the ceiling paint around the medallion to blend any imperfections.
3.3 Installing the Light Fixture or Fan
- Follow Manufacturer's Instructions: Carefully follow the manufacturer's instructions for installing your light fixture or ceiling fan.
- Ensure Secure Connection: Make sure the fixture or fan is securely attached to the electrical box and properly wired.
By following these steps, you can confidently learn how to install a ceiling medallion and add a touch of elegance to your home.
Video: Medallion Magic: Install Your Ceiling Medallion Like a Pro!
Medallion Magic: FAQs
Here are some frequently asked questions to help you successfully install your ceiling medallion.
What if my ceiling isn't perfectly smooth?
Minor imperfections won't usually be a problem. A flexible adhesive caulk can easily fill small gaps. However, for significantly uneven surfaces, consider using shims behind the medallion for a flush, stable fit before applying the adhesive. This will help ensure a secure bond when you install a ceiling medallion.
Can I install a ceiling medallion on a textured ceiling?
Yes, but proper preparation is key! Lightly sand down the texture where the medallion will sit to create a smoother surface for better adhesion. Always clean the area thoroughly after sanding. This will increase the chance of success when you install a ceiling medallion.
What type of adhesive should I use?
A high-quality construction adhesive or a polyurethane-based adhesive caulk is ideal for installing ceiling medallions. Look for products specifically designed for bonding lightweight materials to ceilings. Make sure the adhesive is paintable if you plan to paint the medallion after installation.
How do I find the center of the ceiling for medallion placement?
The easiest way is to measure the width and length of your room and divide each number in half. Where those two measurements intersect is your center point. You can also use the "X" method, connecting opposite corners of the room with chalk lines; the intersection point marks the center. Finding the center is crucial for correctly installing a ceiling medallion.