DIY Tongue and Groove Walls: Pro Install Guide for Beginners

Achieving a stylish, textured wall in your home is within reach, even for beginners. Tongue and groove paneling, often requiring precise cuts with a miter saw, is a project that adds character and value. Many homeowners find inspiration and tutorials from online communities like This Old House. Mastering how to put tongue and groove on walls is simpler than you think, especially when using the right tools and techniques. Consider exploring resources from local Lowe's stores for materials and helpful advice.

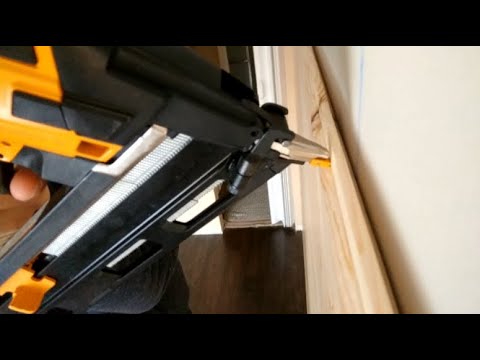
Image taken from the YouTube channel Klaus Plays , from the video titled How To Install Tongue and Groove Wood Planks Siding .
Your First Tongue and Groove Wall: A Beginner's Guide to Success
So, you're ready to transform a room with the timeless charm of tongue and groove walls! That's fantastic. This guide will break down the "how to put tongue and groove on walls" process into manageable steps, making it a project you can confidently tackle. Let's get started!
1. Planning and Preparation: Setting Yourself Up for Success
Before you even think about picking up a hammer, careful planning is essential. A well-prepared space ensures a smoother, more enjoyable installation.
1.1 Assessing Your Wall and Choosing Your Materials
- Wall Condition: Is your existing wall flat, smooth, and free of damage? Addressing any imperfections before installing the tongue and groove will result in a professional-looking finish. Fill holes, sand bumps, and ensure the wall is clean.
- Moisture Content: This is crucial! Tongue and groove can expand and contract with changes in humidity. Acclimate the wood to the room's environment for several days before installation. Stack the planks with spacers in between to allow for proper air circulation.
- Material Selection: Consider the species of wood, its thickness, and finish. Pine is a popular, cost-effective choice, but other options like cedar or oak offer unique looks and properties. Pre-finished tongue and groove saves time but limits your customization options.
1.2 Gathering Your Tools and Supplies
Having the right tools on hand will make the job much easier. Here's a checklist:
- Measuring Tools: Tape measure, level (at least 4 feet long), stud finder.
- Cutting Tools: Miter saw (for accurate cuts), jigsaw (for irregular shapes).
- Fastening Tools: Nail gun (preferred) or hammer, finish nails, construction adhesive.
- Safety Gear: Safety glasses, ear protection, dust mask.
- Other Essentials: Spacers (coins or small pieces of wood), pencil, caulk, sandpaper, wood filler (if needed).
2. Finding Your Studs and Establishing a Level Starting Point
Finding the studs and ensuring your first row is perfectly level are non-negotiable. They form the foundation for the entire wall.
2.1 Locating Wall Studs
- Use a stud finder to accurately locate the studs behind the drywall. Mark their positions with a pencil, extending the lines from floor to ceiling. This is critical for securely fastening the tongue and groove.
- Typically, studs are spaced 16 or 24 inches apart.
2.2 Ensuring a Level Starting Row
- Use a long level to establish a perfectly level line near the floor. This line will serve as the guide for your first row of tongue and groove.
- Even if your floor appears level, always use a level to confirm. Minor discrepancies can compound over the entire wall.
3. Installation: The Heart of the Project
Now for the exciting part – putting the tongue and groove on the wall! Remember to work patiently and double-check your measurements and alignment.
3.1 Applying Adhesive and Fastening the First Row
- Apply a bead of construction adhesive to the back of the first plank.
- Position the plank along your level line, tongue-side up.
- Using a nail gun (or hammer and finish nails), fasten the plank to the wall studs. Angle the nails slightly for better grip.
- Use spacers between the bottom of the plank and the floor to allow for expansion. This is crucial to prevent buckling.
3.2 Interlocking and Securing Subsequent Rows
- Insert the tongue of the next plank into the groove of the first.
- Ensure a snug fit. You might need to use a tapping block and hammer gently to avoid damaging the wood.
- Apply adhesive to the back of the plank and nail it to the studs, just like the first row.
- Continue this process row by row, maintaining consistent alignment and using spacers as needed.
3.3 Cutting and Fitting Around Obstacles
- Carefully measure and mark the tongue and groove planks for any obstacles, such as outlets or windows.
- Use a jigsaw to cut out the required shapes.
- Take your time and make accurate cuts. It's better to cut slightly large and then fine-tune the fit.
4. Finishing Touches: A Polished and Professional Look
The details are what elevate a good installation to a great one. Don't skip these final steps!
4.1 Caulking and Filling Gaps
- Apply caulk along the floor and ceiling lines to seal any gaps.
- Use wood filler to conceal nail holes and any imperfections. Sand the filler smooth once it's dry.
4.2 Sanding and Painting/Staining (If Applicable)
- Lightly sand the entire wall to ensure a smooth, even surface.
- If you're painting or staining, apply the finish according to the manufacturer's instructions. Several thin coats are better than one thick coat.
- Allow ample drying time between coats.
By following these steps, you'll be well on your way to enjoying a beautiful and professionally installed tongue and groove wall. Remember to take your time, double-check your work, and enjoy the process!
Video: DIY Tongue and Groove Walls: Pro Install Guide for Beginners
DIY Tongue and Groove Walls: Beginner FAQs
Here are some frequently asked questions to help you successfully install tongue and groove walls yourself.
What if my walls aren't perfectly straight or plumb?
Slight imperfections are common. Use shims behind the tongue and groove boards where needed to create a straight and even surface. This is especially important when learning how to put tongue and groove on walls for the first time.
Can I install tongue and groove directly over drywall?
Yes, you can! It's a common and effective method. Just be sure to locate and mark the studs for secure nailing. This makes learning how to put tongue and groove on walls much easier.
What's the best way to cut tongue and groove boards to length?
A miter saw is the best tool for accurate and clean cuts. A circular saw can work too, but it's harder to get consistent results. Remember to measure carefully before cutting!
What if I need to remove a tongue and groove board after it's installed?
Carefully pry it loose using a pry bar and shims, working gradually along its length. Be mindful not to damage the surrounding boards. Knowing how to put tongue and groove on walls is only half the battle; sometimes you have to undo your work!